Setup Artumis on Joplin
This is step 2 in setting up your Artumis second brain. Now that Joplin is installed, I’m going to walk you through preparing the app to work as a full-powered second brain. To do this quickly, we will be copying settings and plugins directly into the Joplin profile directory. This is a powerful and fast way to tweak Joplin, but it may look a bit technical. These are the steps
- Open Joplin once to create the profile directory that will hold our settings
- Copy settings and plugins to the profile directory
- Import the notes, notebooks and tags that make up the Artumis second brain system
Create and open the profile directory
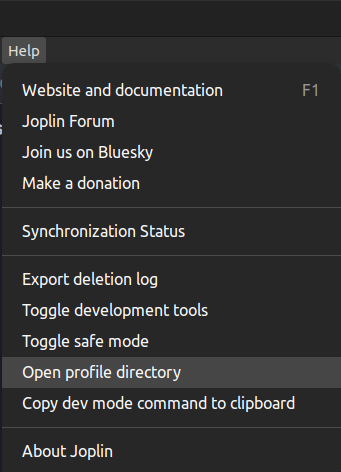
To make sure Joplin creates its profile folder, start the app once. Then click Help -> Open profile directory. Keep the profile directory open in your file manager.
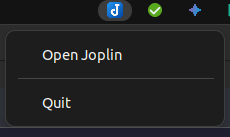
Now close Joplin. Make sure Joplin is completely closed and not just minimized to the system tray. If you see a system tray icon of Joplin, right click it and select Quit. Alternatively close Joplin by pressing Ctrl+q.
Copy settings and plugins to the profile
Download the latest Artumis release from this page. Extract it and copy the following files and folders to the profile directory, overwriting excisting files and folders:
userstyle.cssuserchrome.csssettings.jsonkeymap-desktop.jsonplugins(folder)
Import the Artumis structure
Open Joplin again and delete all default notebooks and notes and tags, so Joplin is completely empty.
Import the Artumis structure:
- Open the
Filemenu - Hoover over
Import - Click
JEX - Joplin Export File - Select the
.jexfile from the Artumis release.- It is called something like:
artumis_on_joplin_2025_03_30_001.jex
- It is called something like:
Open the (1).Start note and go to the Do page to get started. The todo’s there will walk you through Artumis.
Have fun!